
Sewing Room Reveal
I am just so excited to finally share this space with y'all! I have dreamed about this space for years! Back in January, when we started the building process, one of the must haves for me was a sewing room (and bigger laundry room). Since then, I have spent the last 9 months obsessing designing (6 months in my head) this room and of course this was one of the first spaces that was put together. I think I spent an entire day arranging and re-arranging the furniture until it was just right (at least for now..hehe).
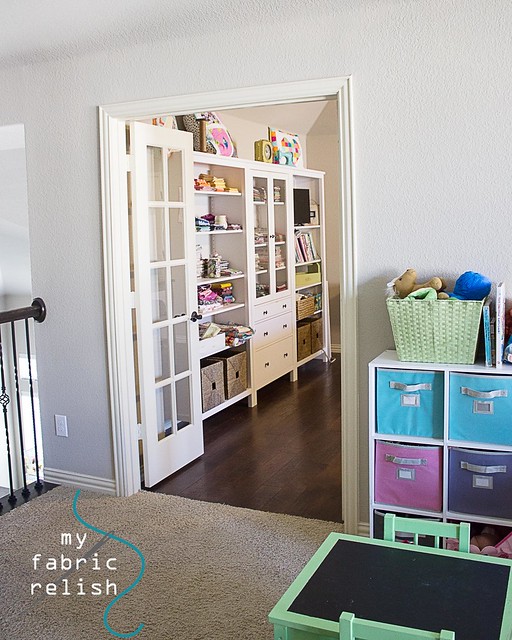
This space is located just outside the play/game room loft upstairs. It's suppose to be the "media" room but we rarely watch movies (unless a princess is involved) so I knew it would make a great space for me. Since we came in early during the building process, we were able to add a large window, hardwood floors, and french doors. I think the builder thought I was nuts to do all this to a media room! I love that the doors look out into the play area and I can have them open or shut without feeling shut out (or in). I would totally show you more of the playroom, but that space is still a HUGE work in progress (and super messy)!
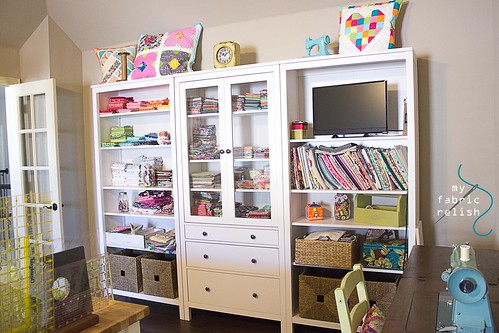
So this summer, I earned extra money by teaching a few weeks of summer sewing camps and used the money to get a few big ticket items from Ikea including these awesome HEMNES bookshelves. They were actually pretty fast to put together and I just love having all my fabrics in view. I like to keep my favorite collections behind the glass and then the drawers hold the larger backing cuts and interfacing bolts (bottom drawer is the perfect size for those interfacing bolts)!
Mr Relish was so sweet to get me a new smart tv so I can watch Netflix and Amazon and I dont have to worry about hooking up to the cable box. :) You can spot my vintage 327k machine/table that I refinished back in the Spring. I might not use her everyday, but I love having her out to admire! I even spray painted a cheap decorative one from Hobby Lobby to match (next to heart pillow on shelf)! I wanted it to be one of the first things people see when they go into the space and like I said, I just love looking at her!
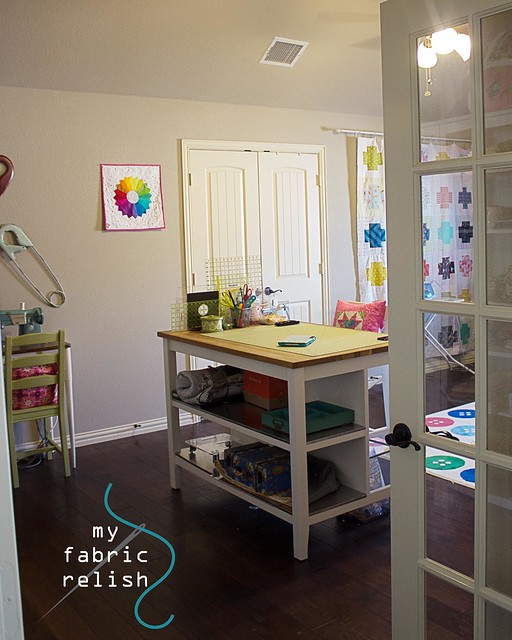
The cabinet in the back houses my printer, Silhouette and all my paper crafting supplies. Then of course my sewing machines including my serger next to the Juki. I'm using my old Ikea kitchen table from my single, one-bedroom apt days as a sewing table and then spray paited the chairs all different colors to use around the room.
It's so amazing to finally have a design wall! My sweet teenage helper from summer helped me make it during naptime one day. It seriously was really fast and easy. Just foam insulation, batting and duck tape. I think the hardest part was the logistics of getting it home! Luckily, I tricked Mr. Relish into taking me to home depot for paint. HAHAHA! I put my Virtual Quilting Bee blocks up there first to force me to finally piece them - over a month ago. Oops.
I am super excited to share this last piece with you....


The girls love prancing in front of this mirror. I think it's the perfect size and height for them. I actually had to clean it before the picture because of all the hand and kiss prints they left for me.
Well, thats it! So far, it's been such a joy to create in this space every day. I love not having to put all my things away at the end of the day and being able to see all my fabrics out. This space really lets me have several projects going at once without feeling overwhelmed. You know what I mean? If you have any questions, please leave a comment or shoot me an email! Have a great weekend!!

Oh, I wanted to share this with y'all, too: Here is the picture I shared Monday of big relish trying out the DSLR.
Well, when I went to download the sewing room pictures, I found this one and thought it was fun!

This space is located just outside the play/game room loft upstairs. It's suppose to be the "media" room but we rarely watch movies (unless a princess is involved) so I knew it would make a great space for me. Since we came in early during the building process, we were able to add a large window, hardwood floors, and french doors. I think the builder thought I was nuts to do all this to a media room! I love that the doors look out into the play area and I can have them open or shut without feeling shut out (or in). I would totally show you more of the playroom, but that space is still a HUGE work in progress (and super messy)!
So this summer, I earned extra money by teaching a few weeks of summer sewing camps and used the money to get a few big ticket items from Ikea including these awesome HEMNES bookshelves. They were actually pretty fast to put together and I just love having all my fabrics in view. I like to keep my favorite collections behind the glass and then the drawers hold the larger backing cuts and interfacing bolts (bottom drawer is the perfect size for those interfacing bolts)!
Mr Relish was so sweet to get me a new smart tv so I can watch Netflix and Amazon and I dont have to worry about hooking up to the cable box. :) You can spot my vintage 327k machine/table that I refinished back in the Spring. I might not use her everyday, but I love having her out to admire! I even spray painted a cheap decorative one from Hobby Lobby to match (next to heart pillow on shelf)! I wanted it to be one of the first things people see when they go into the space and like I said, I just love looking at her!
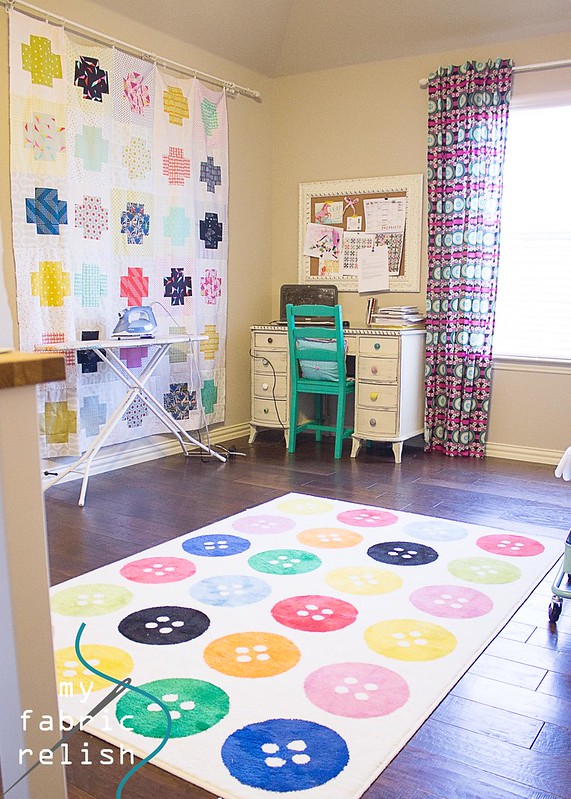
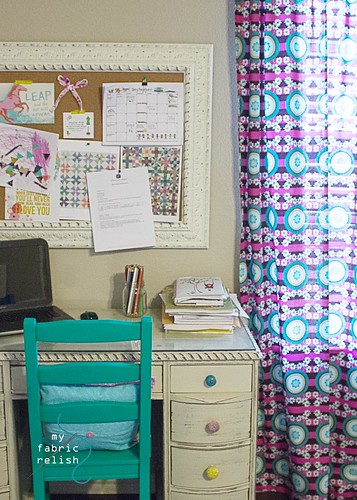
On the other side of room, I have my desk for computer work, ironing station, and my quilts-in-waiting wall/rod.
It was really hard to decide how I wanted to display my quilts-in-waiting and think I found an awesome solution! I wanted to be able to hold small and large quilt tops, but also heavy quilts for taking pictures without putting holes in my walls or quilts. Do you know how hard it is to find white curtain rods? The ones at Target werent right (crystal ball ends) which looks adorable in the relishes' rooms (another post soon), but not what I was looking for in here. I finally found these at Walmart and then found the curtain ring/clips at Lowes. So, I originally planned on making the curtains with a different fabric, but I couldn't pass up an awesome sale and decided on some Anna Maria Horner. If I get bored, I can make them into backing for a quilt and get new ones. I just can't leave them up too long or else they will get too discolored from the sun. Oh, and the widely popular button rug from Ikea was a must! This rug is sooooo soft! I love scooting my feet across it when I walk on it, the girls love sitting on it when they play or color, and the dogs naps on it daily. Hmmm, maybe I should've bought two for when this one starts looking bad. This floor area is nice and big for basting quilts, I just roll the rug out of the way.
I found this desk at a local antique mall and it was already refinished, except I really wasn't in love with the drawer pulls and went whimsy with mis-match pulls from Hobby Lobby. I also got the cork board from HL. See a trend? I might need an intervention, but wait until after Christmas. hehe :)
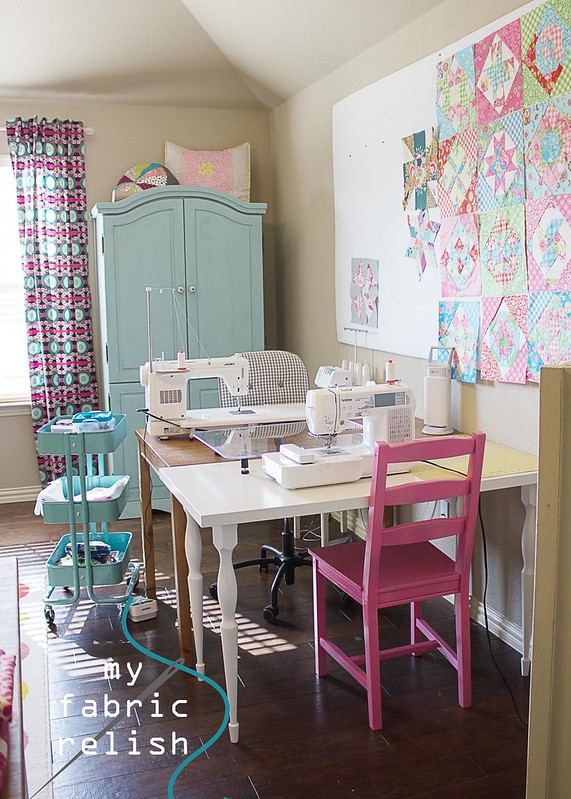
The cabinet in the back houses my printer, Silhouette and all my paper crafting supplies. Then of course my sewing machines including my serger next to the Juki. I'm using my old Ikea kitchen table from my single, one-bedroom apt days as a sewing table and then spray paited the chairs all different colors to use around the room.
It's so amazing to finally have a design wall! My sweet teenage helper from summer helped me make it during naptime one day. It seriously was really fast and easy. Just foam insulation, batting and duck tape. I think the hardest part was the logistics of getting it home! Luckily, I tricked Mr. Relish into taking me to home depot for paint. HAHAHA! I put my Virtual Quilting Bee blocks up there first to force me to finally piece them - over a month ago. Oops.
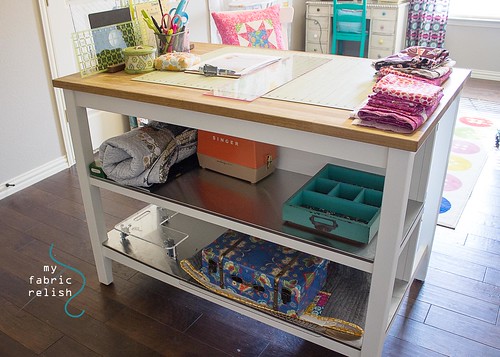
Of course now sewing space is complete without the awesome teal cart from Ikea. I love this thing! On the top I keep all my sewing machine supplies for each machine (feet, needles, screwdriver), scissors, bobbins, and pins so when I move from one machine to the next I can just wheel the cart with me. I use the other baskets to hold various project waiting to get worked on.
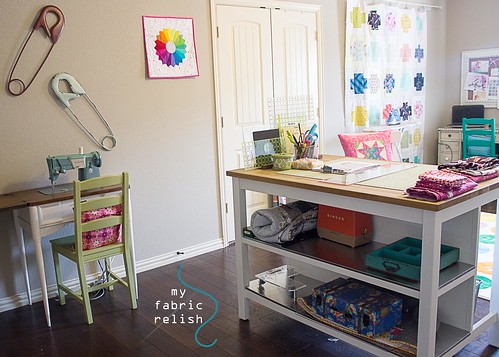
I also love love my new cutting table! It's also from Ikea and the perfect height for standing and cutting or I can sit on the bar stool and slowly cut while watching Netflix. I also love my large closet to keep all my other not as visually appealing supplies. Batting on the roll just doesnt do it for me, ;) I hope to use the wall with the singer and safety pin art (HL again. I know, I know.) to put up my mini quilts, I really never tried to make minis before because I didn't have a great place to put them but now I do! I made the colorwcolor wheel back in February and it really has been a great tool to have around the sewing room. I refer to it quite a bit and lets face it, it's way cuter than the ones from the paint section at HL. LOL!!
I am super excited to share this last piece with you....
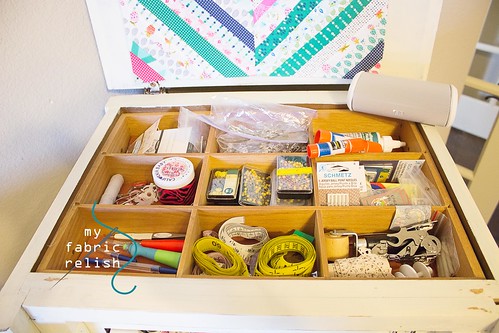
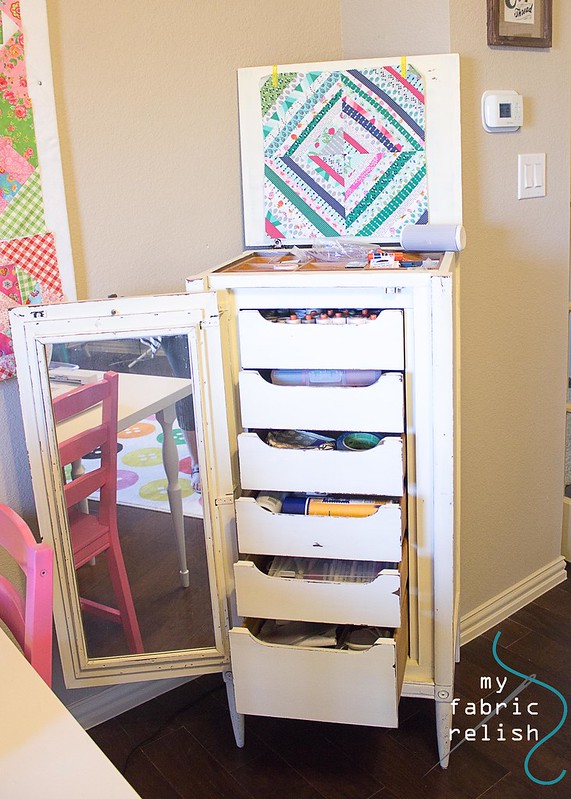
,,, this antique lingerie dresser. I found this at the same antique store I found the desk and admired it for over a year. I remember being pregnant with little relish and thinking it would be great for sewing supplies. When we were sure that I was going to get a sewing space, I went to see if it was still there and it was! I had to put it in storage for a few months but totally worth it! It has jewelery compartments on the top, perfect for my small tools and notions, and then lots of shallow drawers to hold my threads, smaller rulers, quilting, and embroidery supplies.
The girls love prancing in front of this mirror. I think it's the perfect size and height for them. I actually had to clean it before the picture because of all the hand and kiss prints they left for me.
Well, thats it! So far, it's been such a joy to create in this space every day. I love not having to put all my things away at the end of the day and being able to see all my fabrics out. This space really lets me have several projects going at once without feeling overwhelmed. You know what I mean? If you have any questions, please leave a comment or shoot me an email! Have a great weekend!!
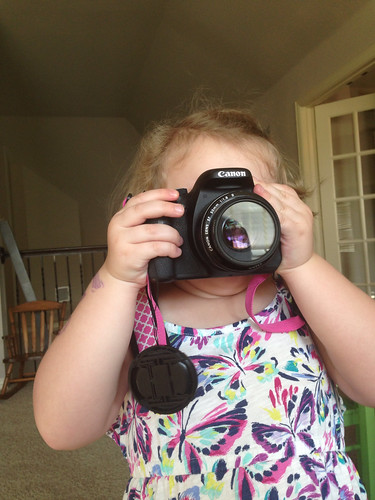
Oh, I wanted to share this with y'all, too: Here is the picture I shared Monday of big relish trying out the DSLR.
Well, when I went to download the sewing room pictures, I found this one and thought it was fun!


What a fantastic welling space. Nicely done! I wish I had one too :)
ReplyDeleteOr "well lit" space :)
Deletebeautiful room so much light!!!!
ReplyDeleteJust moved into my new condo and you gave me some great ideas for my new quilt room. Thanks. One question though, "How did you hang your design wall?"
ReplyDeleteDebbie
Oh your room is fabulous! Also I have the same little orange singer that is on the shelf of your cutting table :)
ReplyDeleteWhat a dream come true! Your new sewing room is simply dreamy! All put together. So beautiful. Just sew happy for you, Melissa! You deserve it!
ReplyDeleteHow gorgeous. So bright and fresh! An inspiring space for sure! :)
ReplyDeleteHey Melissa, beautiful job!!! I love the size of the room and the bookshelves and cutting table! Everything is so pretty. I love the curtain rod idea, and I know what you mean about finding white curtain rods!!! Why IS it so hard? I want to ask the same question as Daytona Damsel--how did you hang the design wall?
ReplyDeleteThis is amazing! So many personal twists. So bright and happy. Congrats!
ReplyDeleteLove your sewing space so much! The 6 months of designing and 3 months of bringing it to life have paid off for sure! Love your rolling tool cabinet! That looks very handy .. and love your repurposed jewelry cabinet too! Love it all though... including those uber big paper clips! Thanks for sharing... Big relish got a great steady shot of you too! Kathi
ReplyDeleteWhat a fabulous room. Congrats. I know you will enjoy it!
ReplyDeleteoh Melissa I can see how much planning has gone in to make this wonderful swing room, so many pieces I envy here what would we do without Ikea. Must check out the trolley you have there next time I go as I have just the right place for one of those.Well worth all the planning lovely job!
ReplyDeleteOMG I am so jealous! You really have one the most beautiful craft rooms!
ReplyDeleteGorgeous love all your furniture choices. off to noodle on ikeas site now!
ReplyDeleteAbsolutely beautiful. I dream of having a space like this one day.
ReplyDeleteWow wow wow!!! So nice and bright and awesome! I'm secretly taking notes for when I one day get my own craft room. ;)
ReplyDeleteLOVE your sewing room!!! Everything is just perfect!! We also just moved and I got my own sewing room!! You have truly inspired me! Wish you could come over and help me!!!
ReplyDeleteWow - this is amazing. I much prefer this to a media room. I love how the space is so personal to you and contains so many fabulous items. Very jealous! :)
ReplyDeleteHi Melissa.....this new sewing room is beyond amazing! No doubt you will create even more beautiful quilts and other goodies in this space. I can only imagine the rest of your new home and how pretty you have made it.
ReplyDeleteTami
What piece is your cutting table?
ReplyDeleteWow Melissa ! What a wonderful space to spend lots of hours in !! Congratulations !
ReplyDeleteGood post about style and clothing. Flags Embroidery Designs I simply love your post. Thanks.
ReplyDeleteIf they get stuck or mess up, what a terrible job it is trying to rip out those stitches! All you really need to make a great button hole is a straight stitch, a zig zag stitch, forward and reverse, and a stitch length and width adjustment. best portable sewing machine
ReplyDelete